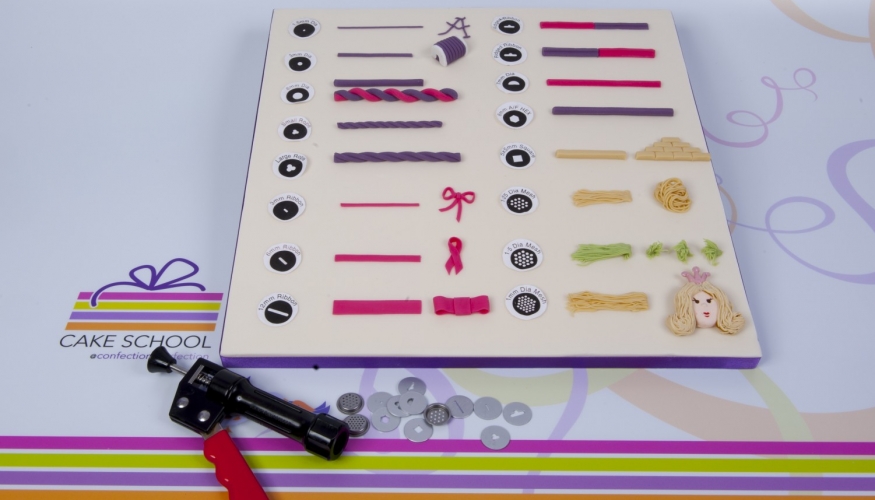
How to use a sugar gun
The sugar gun is one of my favourite pieces of sugar craft equipment. They are incredibly versatile and once you have one you will wonder how you managed without it.

People often struggle with the sugar gun initially but if you follow my easy stages it is very straightforward.
The sugar gun comes with 16 discs and the picture illustrates what each one looks like. The twisted rope makes a lovely design around the base of cakes and is much easier than piping. The mesh discs are perfect for grass, fur, hair, tassels or spaghetti, the single threads are super for cotton reels, knitting, lettering, the flat ribbon discs are ideal not only for creating ribbons and bows but also white lines on roads. You can use the different discs to help you produce interesting side designs, decorative trims on handbag cakes and so much more.
- You need to choose a paste which has some elasticity. I like the Karen Davies sugar paste or alternatively work a little flower (petal) paste into your sugar paste.
- Next you need to soften the paste. Add enough petal base or Trex (white vegetable fat) to achieve the consistency of chewed chewing gum! Knead the petal base into the paste a little at a time until you achieve the correct consistency.
- Roll a sausage of paste and insert this into the barrel of the sugar gun. Place your chosen disc on top and screw on the top.
- Push the black plunger down until you can just see the paste being pushed through the disc. Pump the red handle and extrude the required length of paste. If the gun makes a clicking noise it means the paste is too firm. Take it out, add more petal base and then try again.
Have fun, experiment and do let me know how you get on. Annabelle
